
Why do I need a website?
Having a website is crucial for businesses and individuals alike. Whether you’re looking to build your website, creating or making a website, having an online presence provides a platform to showcase your skills, expertise, products or services to a global audience.
A website enhances credibility and acts as a marketing tool, providing a cost-effective way to reach potential customers who might not have otherwise found you.
It also makes information accessible to anyone who simply have access to the internet, allowing businesses to offer online sales or services. In summary, creating a website is essential for anyone looking to establish themselves or their business in the digital realm and stay ahead of the competition.
What are types of websites you can build?
- Personal websites: These websites are created to showcase an individual’s skills, talents, hobbies, or interests. They can be used to create an online presence or to promote personal branding.
- Business websites: These websites are designed to promote a business or organization, showcase its products or services, and provide information about its mission, values, and history.
- E-commerce websites: These websites are built to facilitate online transactions, allowing businesses to sell their products or services directly to customers over the internet.
- Blogging websites: These websites are built to publish regular content in the form of articles, photos, videos, or podcasts. They can be used for personal or professional purposes and often incorporate social media sharing and commenting functionality.
- Portfolio websites: These websites are built to showcase an individual’s or a business’s work, skills, or achievements in a particular field, such as photography, design, or writing.
- Educational websites: These websites are built to provide educational resources, courses, or tutorials to students or learners.
In this step by step beginner’s guide we will show you how you can build your own website in 9 steps using WordPress (CMS), the guide also includes recommendations on some of the essentials plugins you will need to install once you create your website and at the bottom of this page we have answered some of them popular questions.
Disclosure: when you click on links on this page, we earn some commission with no extra cost to you when using our links. This helps us to maintain Make Website Expert and keep it running.
Table of Contents
- Why do I need a website?
- What are types of websites you can build?
- Step 1: Choose platform for your website
- Step 2: Get web hosting and register domain
- Step 3: Website planning (optional)
- Step 4: Installing WordPress and choosing a template for your website
- Step 5: Create pages and add content
- Step 6: Popular WordPress plugins
- Step 7: Optimizing your website
- Step 8: Publishing your website
- Step 9: Maintaining your website
- FAQ
Step 1: Choose platform for your website
First let’s understand what does platform mean?
In simple terms platform means an online program enables you to build a website without any coding knowledge, you can simply build a real eCommerce website using Shopify, Woocommerce to sell products or portfolio website etc using WordPress or website builder etc.
Since there are different types of platforms such as WordPress, Wix, Squarespace, Weebly, Shopify and more, each one of them offers different features, user interface and pricing.
If you want to learn more about website builder then checkout our guide on best website builders so you can choose the the right one.
The graph below shows CMS usage distribution (example WordPress)
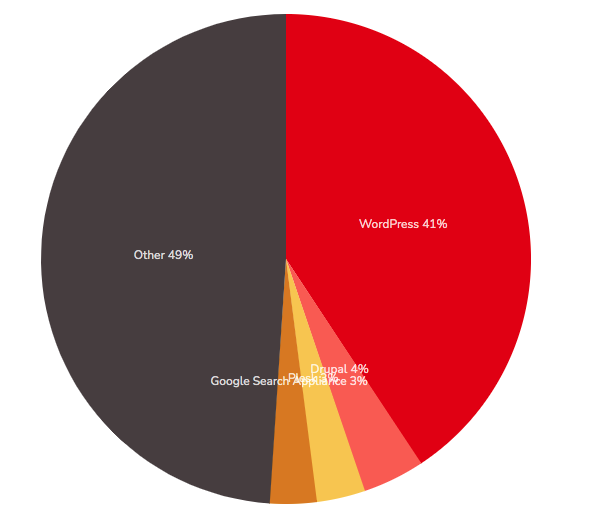
*source builtwith
Here is why many people are choosing WordPress to build their website
- Easy to use: WordPress has intuitive user interface.
- Global community: WordPress has a massive global community which means it’s super easy to find support for an issue you run into.
- You can scale up the website by using themes and plugins.
- Lower cost: WordPress offers more out of the box solutions.
- Mobile friendly: With WordPress websites are mobile friendly by default.
WordPress Usage Statistics

*source builtwith
You can view list of top million websites by traffic using WordPress.
Step 2: Get web hosting and register domain
Before you start there are two important components you need to have to get your website up and running.
- Domain name: is like the address of your house, but for your website on the internet. It’s a unique name that you choose for your website, such as www.YourDomainName.com. When someone types your domain name into a web browser, it directs them to your website.
- Web hosting: is like renting space on the internet where your website going to be stored i.e images files etc, and hosting is what makes your website available to be viewed by others on the internet.
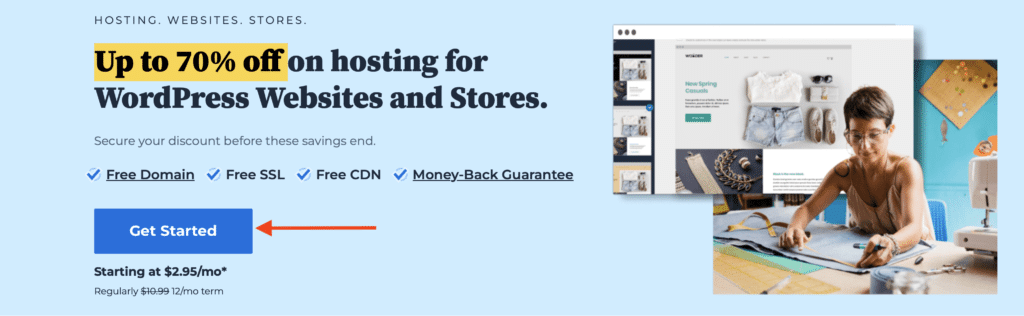
For this guide I am going to use Bluehost as a web host provider for few reasons
- WordPress has recommended few web-hosting providers and top of the list is Bluehost.
- Installing WordPress with Bluehost is just a click of a button.
- Bluehost has 24/7 in house support.
You can check out our ultimate guide on best web-hosting providers if you want to choose a different we-hosting provider.
Pro tip: Sign up process is similar regardless which web hosting provider you choose.
Now let’s start the process to choose and register a domain
- First go to Bluehost and click on get started
2. Select a plan
To bring your website to life then you need to choose a plan to host your website.
In this guide we are going to use shared hosting service but you can explore different hosting services offered by Bluehost and save up to 75%.
As you can see there are four different plans to choose from starting from the basic plan to Pro.
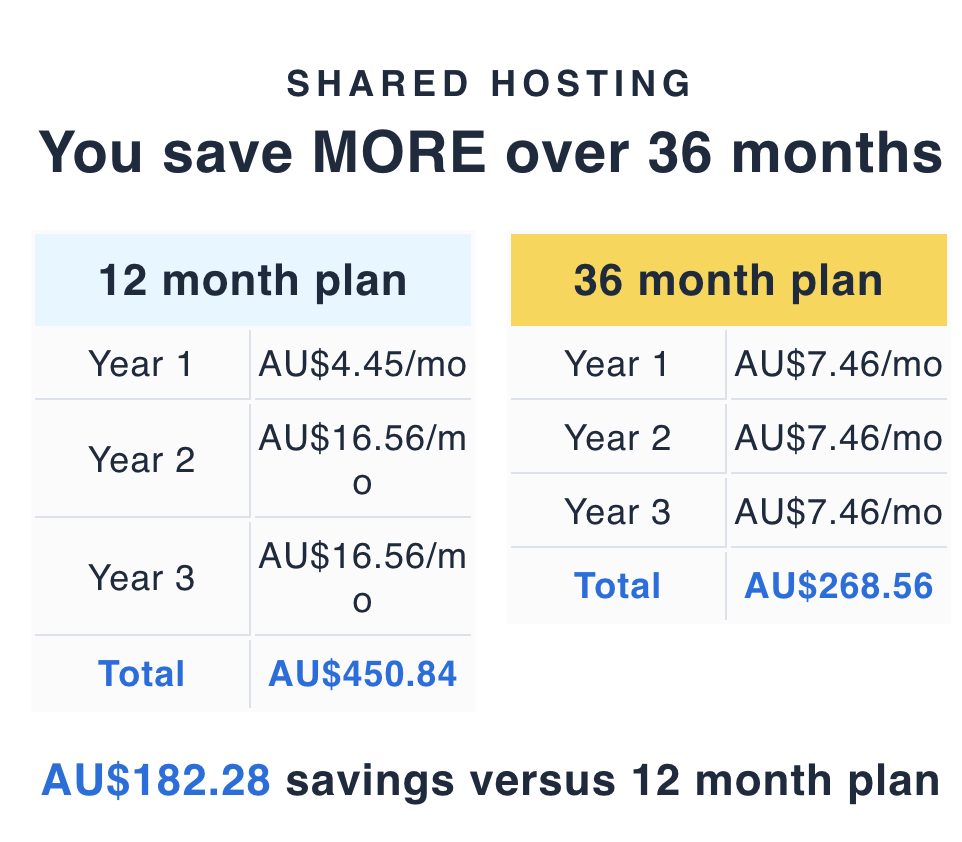
Pro tip: In the pricing page there is an option at the top to choose a plan for 12 month or 36 months.
If you are planning to keep the website for a long time then we recommend you to sign up for 36 months because you can save up to $182 versus 12 months plan.
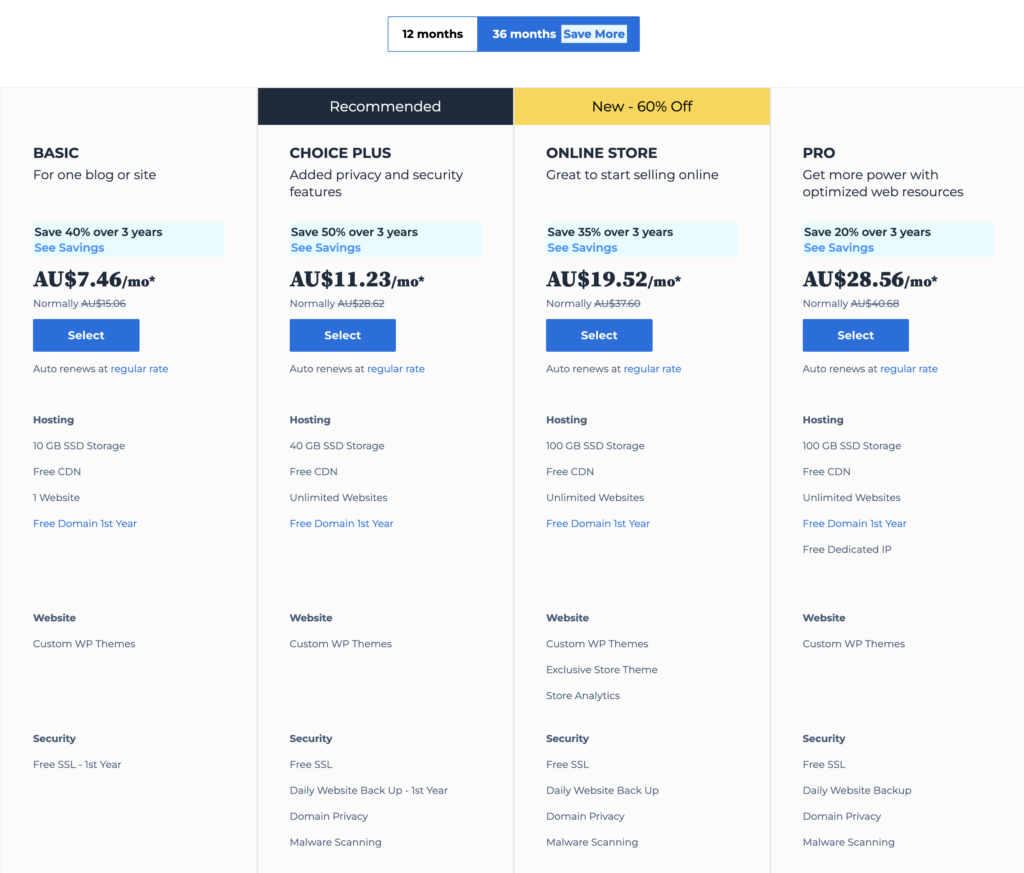
Basic plan is suitable for small websites with low traffic. However, if you get/expect more traffic, you can upgrade later to other plans such as Pro.
Regardless of which plan you choose, you always have the option to downgrade or upgrade based on business needs.
3. Choose a domain name
To create a new domain, start typing into the search box to select the available name.
If you already have an existing domain then you can choose Use a domain you own, to transfer your domain to Bluehost.
If you need help choosing a domain then checkout our guide on how to choose the best domain name
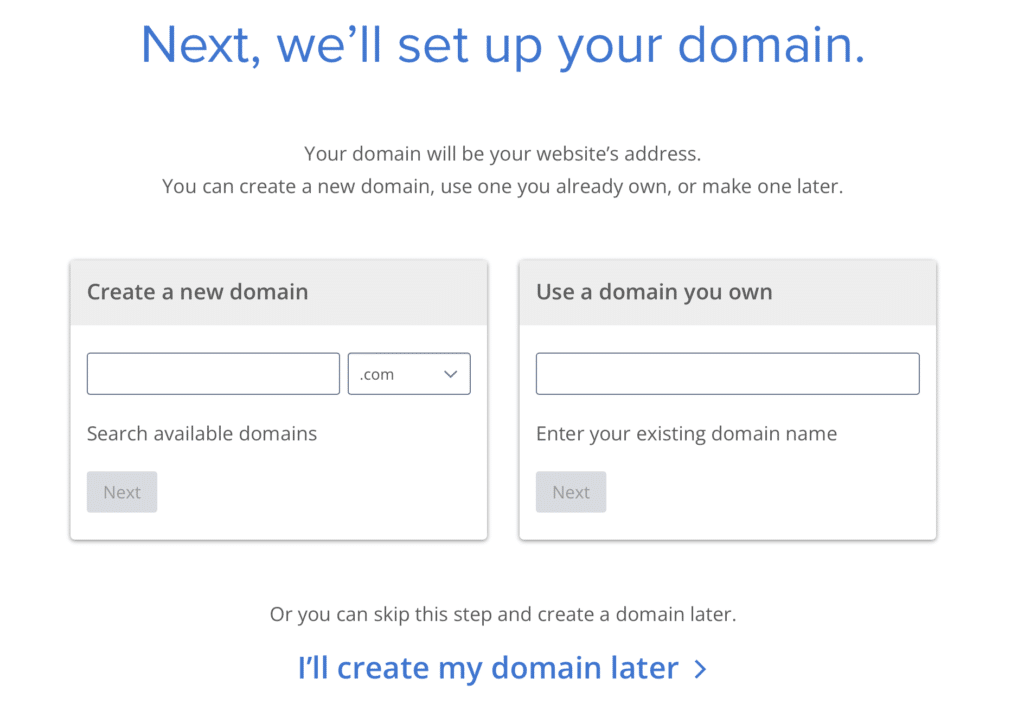
In this beginner’s guide we’re going to create a new domain name.
First start by typing a name, we have chosen buildtestwebsite.com as domain name.
Once you finish typing the name then click next.
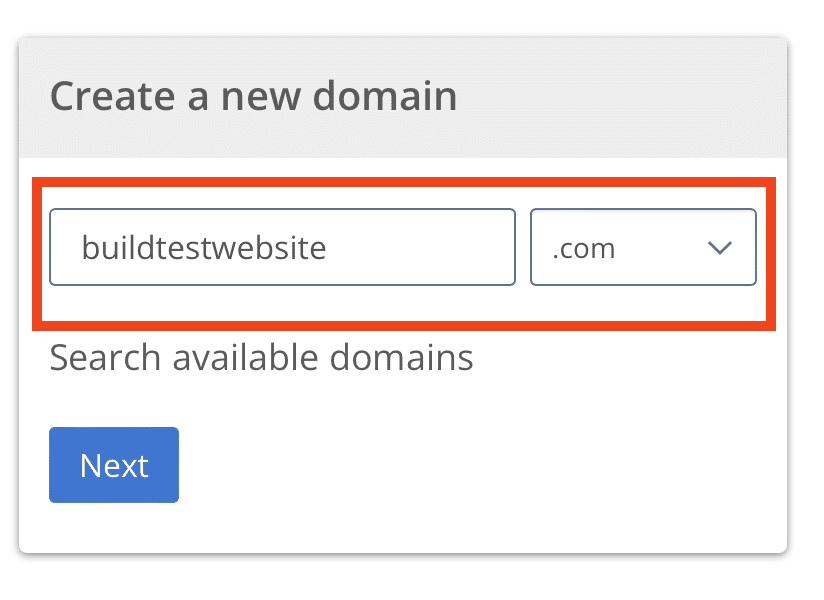
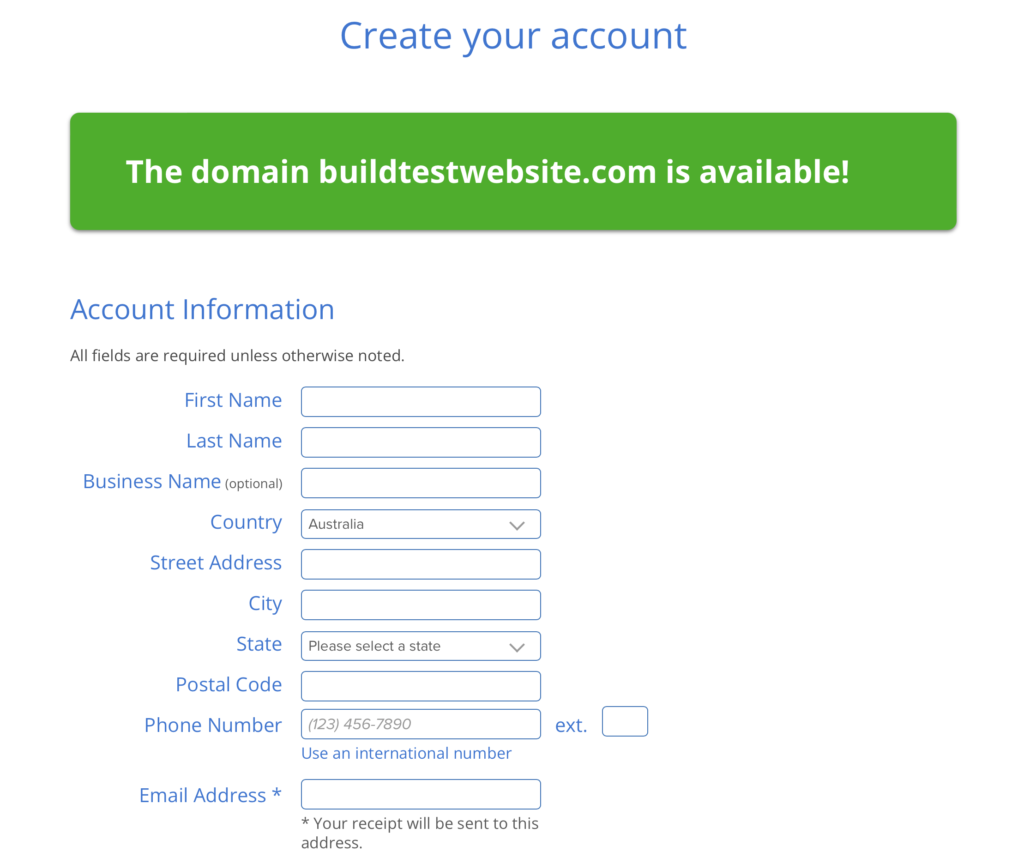
As you can see Bluehost indicated that the domain name is available so we can use it.
Now we have chosen domain name.
Next step we need to fill out account information page below.
In the payment package information step you need to choose account plan either 12 or 36 months.
Pro tip: sign up for 36 months if you’re planning to keep the site for a long time so you can save money.
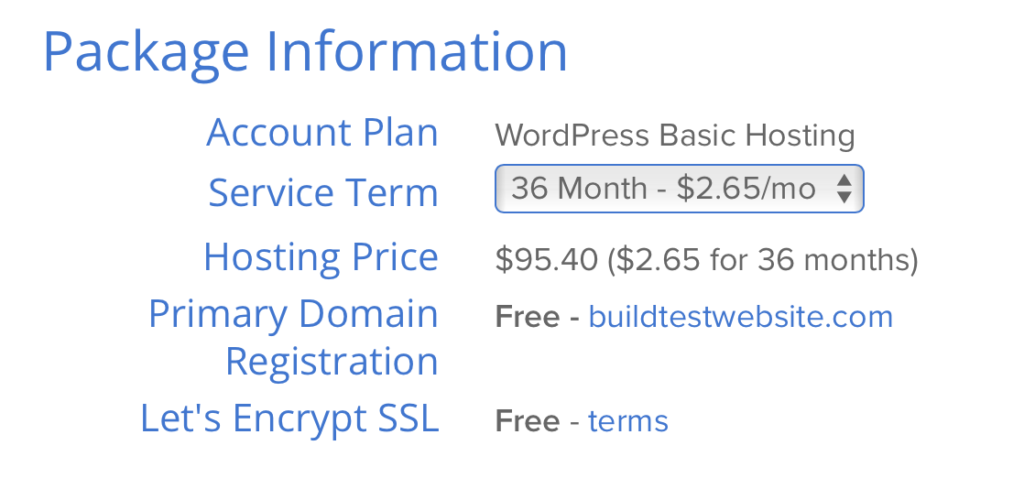
*All plans and products automatically renew unless you cancel.
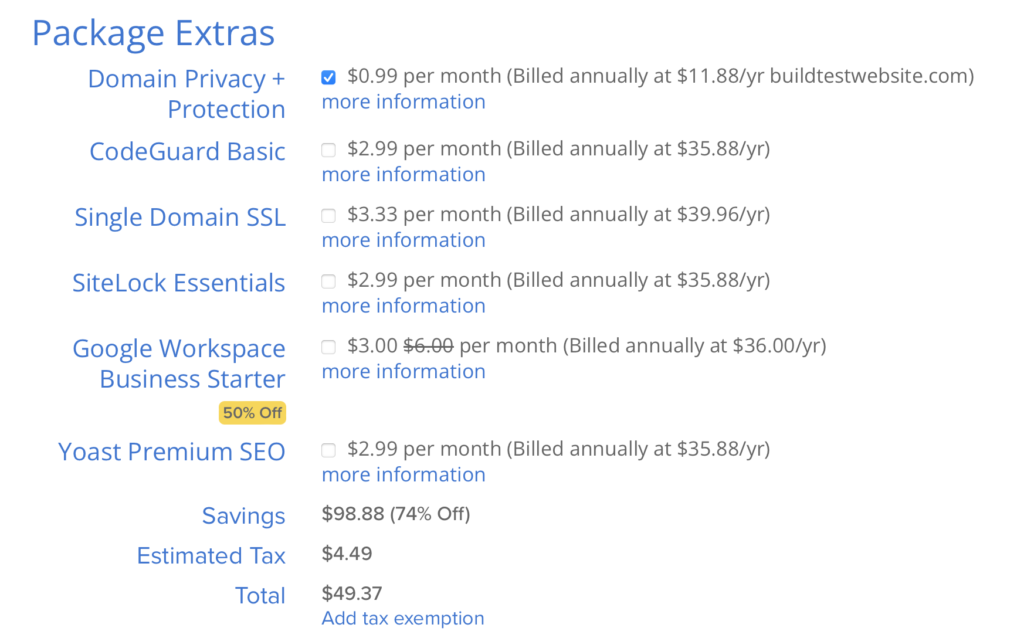
Last step before payment is package extras
In this last step, as you can see you have the option to add extras to your website.
These extras do provide more functionally, security and better ranking in search engines to you site.
Our recommendation
- Domain privacy protection to protect your personal contact information from marketers, spammers, and unwanted solicitation.
- CodeGuard Basic: it’s a backup service for your website which is important however there are other cheaper options such as updraftplus plugin which you can install later (will show you how later in this guide).
- Single domain SSL: this one is important as well but you can get it for FREE (will show you how later in this guide).
- Yoast SEO: the FREE plane gives you everything you need to start ranking in search engines. You can get premium later if you need it. You can check out their page for a comparison between plans
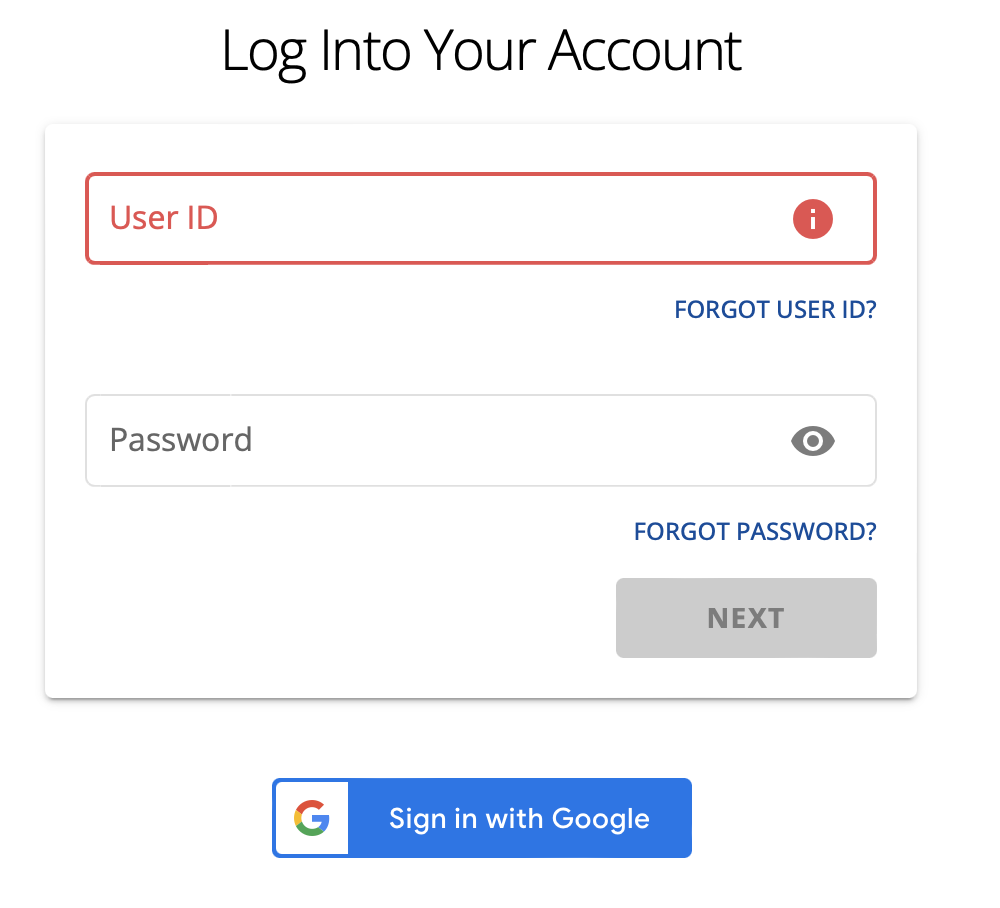
When registration process is complete then you will be able to create a password to have an account
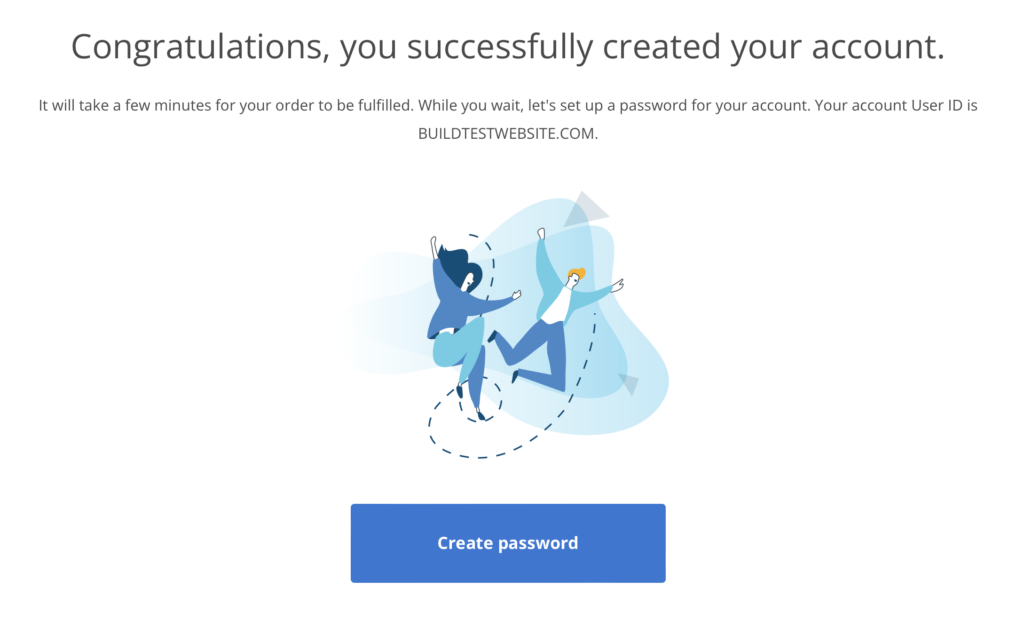
To create an account then click on Create password
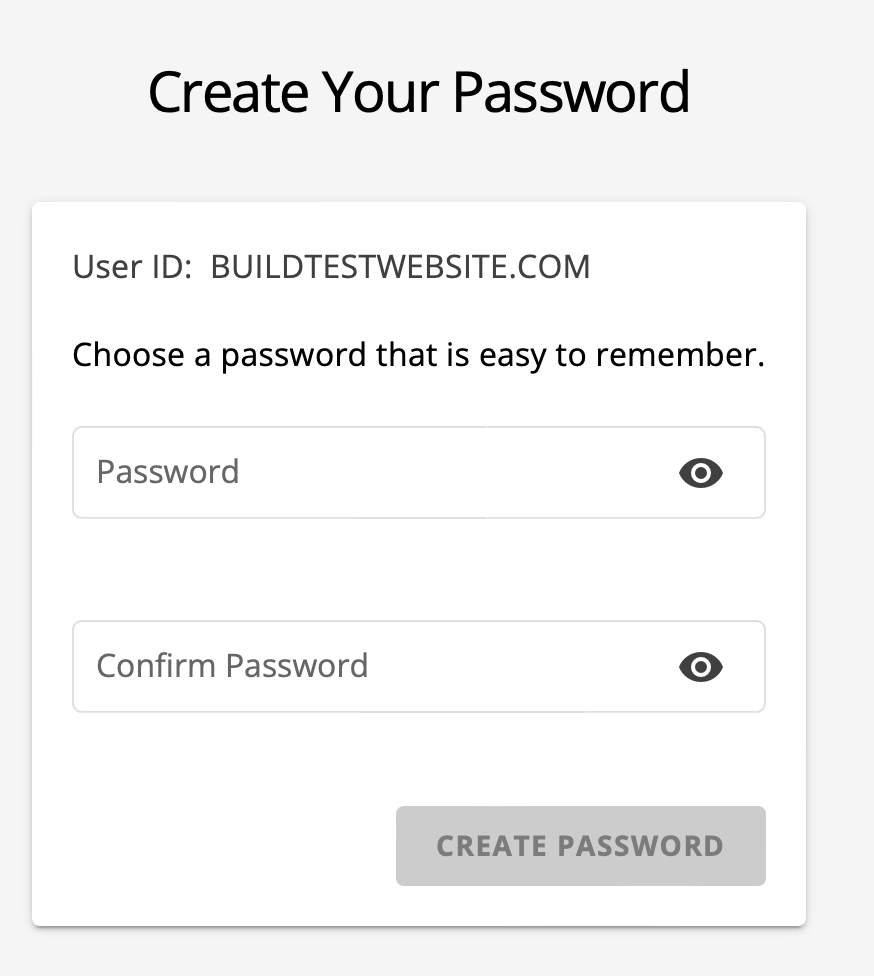
All need to login
- Your newly created domain name (the one your created eg: BUILDTESTWEBSITE.COM)
- Password you chosen when creating your account then click next.
Step 3: Website planning (optional)
Now you should start planning your website before start building pages, forms etc.
What are the key benefits of website planning?
- Helps to define the website’s purpose and goals, ensuring that the website is designed with these objectives in mind.
- Consistency and branding: Website planning includes defining the website’s branding and visual identity, ensuring a consistent look and feel across all pages and content.
- Improved user experience: Website planning includes creating user personas and mapping out the user journey, ensuring that the website is easy to navigate and meets the needs of the target audience.
Which tools can you use to help do your website planning?
There are lots of tool out there help you to do website planning and they offer FREE options
- Figma visual site map generator you can use to plan your website, to get started then you need to create an account and choose one of their templates or start from scratch. It’s free for the base level. You can check out their pricing page to see the difference between plans. You can checkout this video on YouTube by Figma on how to create a sitemap/ website planning.
- Octopus.do is another good option which you can you for free as well to plan your website. Checkout their pricing page to understand the difference between plans.
Below is an example of website planning using Octopus.do
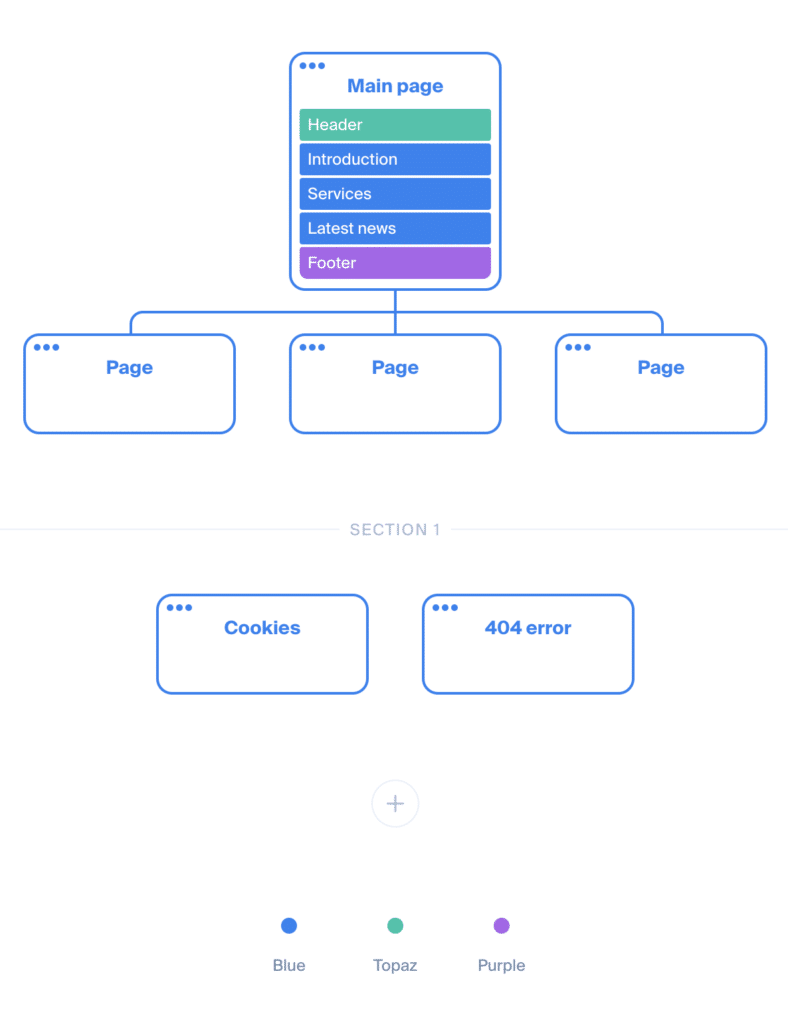
At this stage we found Octopus.do is really
- Simple
- You don’t need an account
- it has a really nice colorful visual sitemap, website planning just pleasant to look at.
Pro tip: we strongly suggest you do this step even if you have no plans to build a website for clients at this stage, reason is that website planning is a skill which will always be handy in the real world
Step 4: Installing WordPress and choosing a template for your website
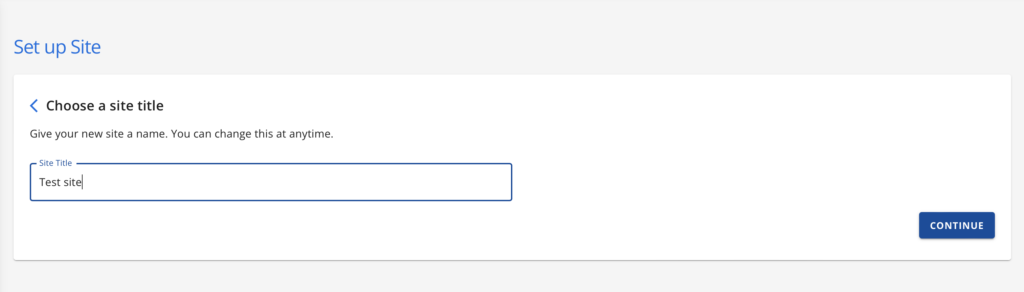
After you login to to the account, now you can start with setup your site.
First thing is to choose a title for the site and click continue.
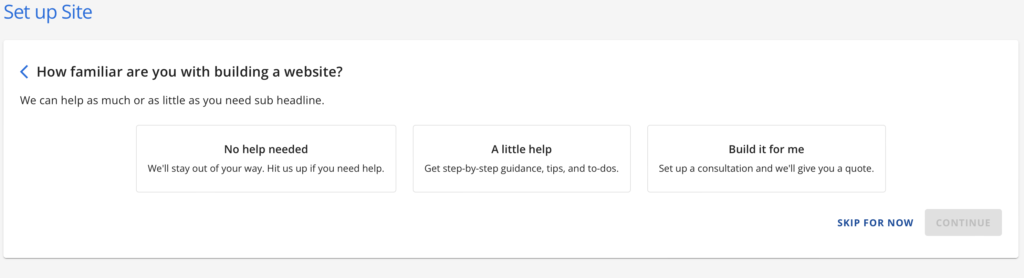
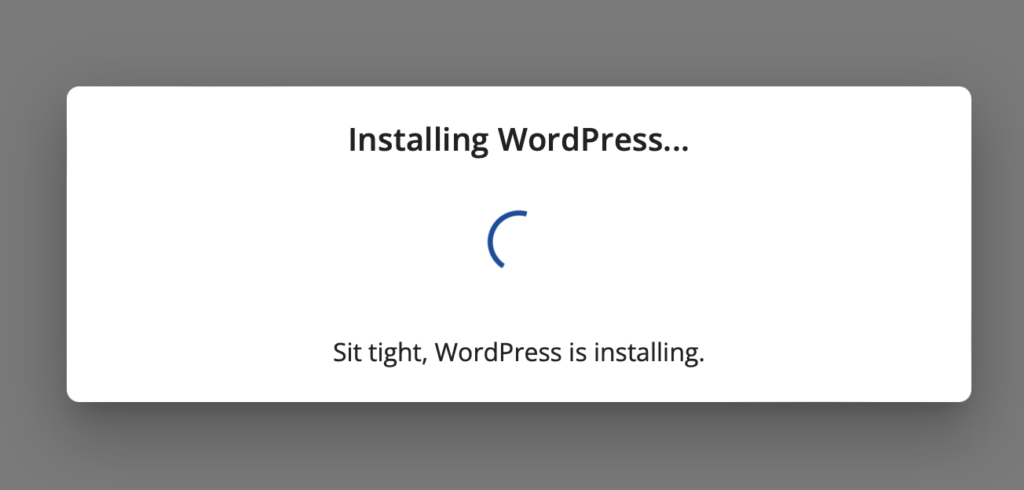
Then you get a question about your experience in building websites, for this guide we chose to skip for now.
Once you click Skip for now then you get a message like the one below
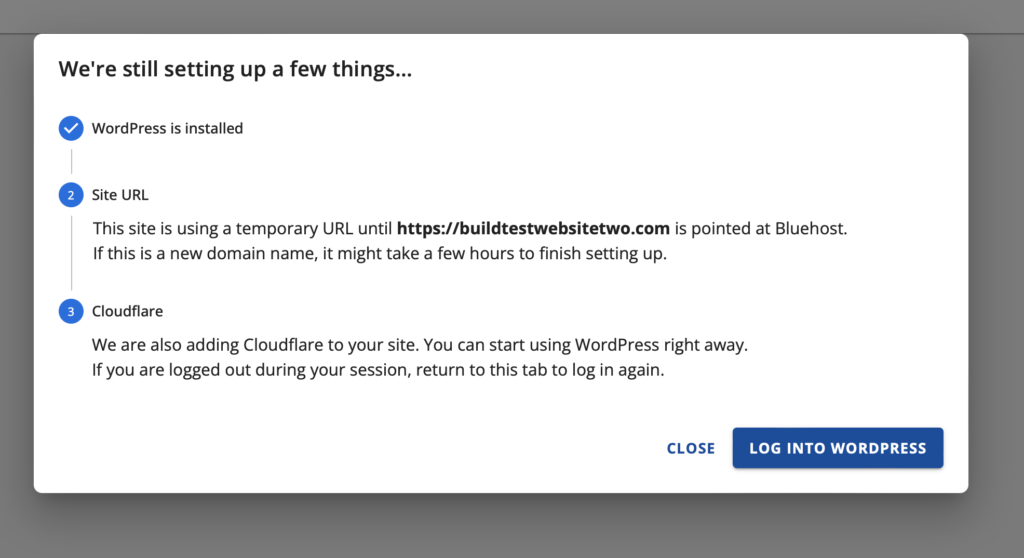
Few seconds later you will get a summary, review it then click on Log Into WordPress
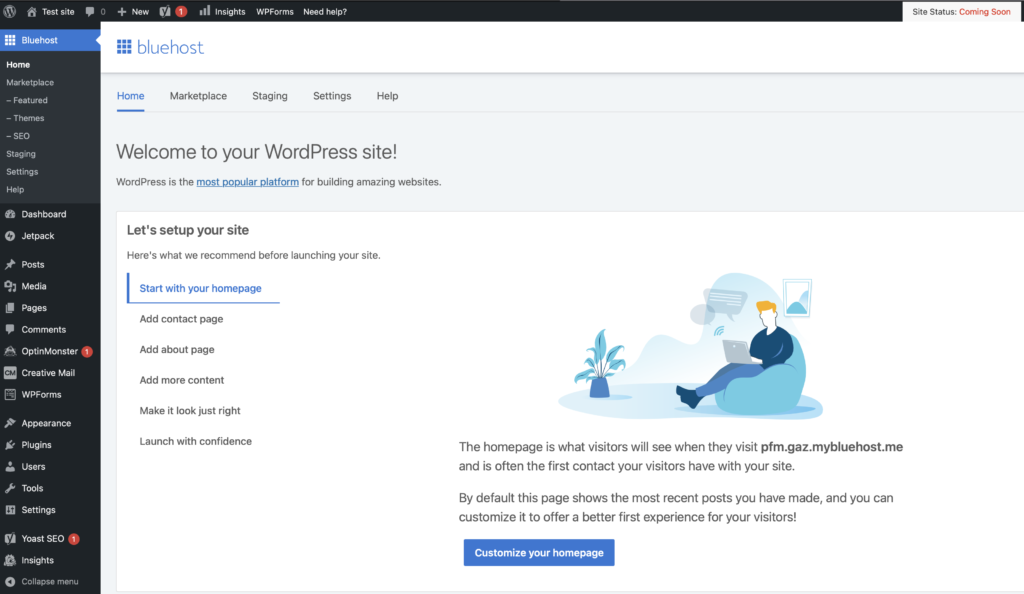
You will land in the dashboard page
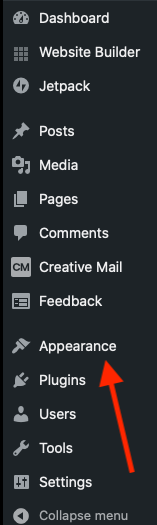
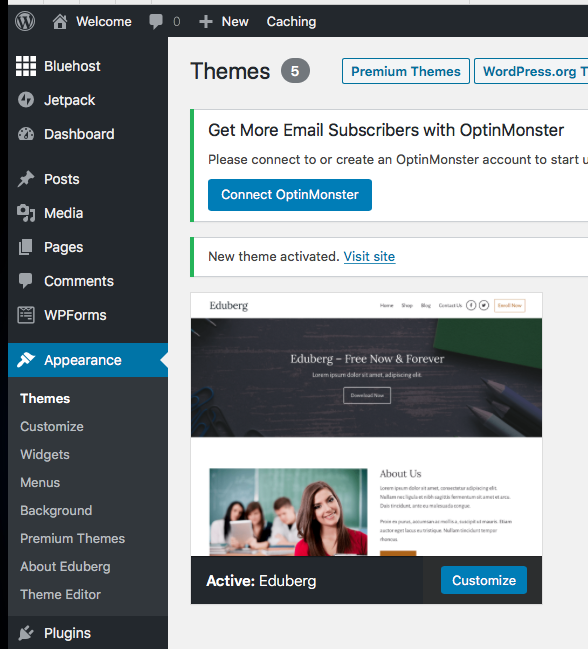
Now you have WordPress installed so next step is to choose a theme to your site
Go to the sidebar and click on Appearance.
To browse themes then click on Add new theme.
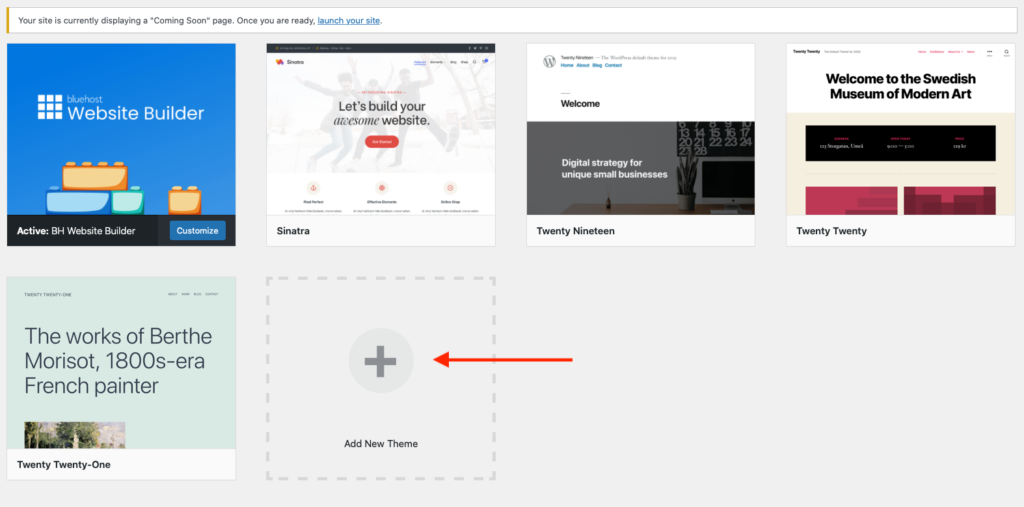
You can filter results based on based on popular, latest, favorites and premium.
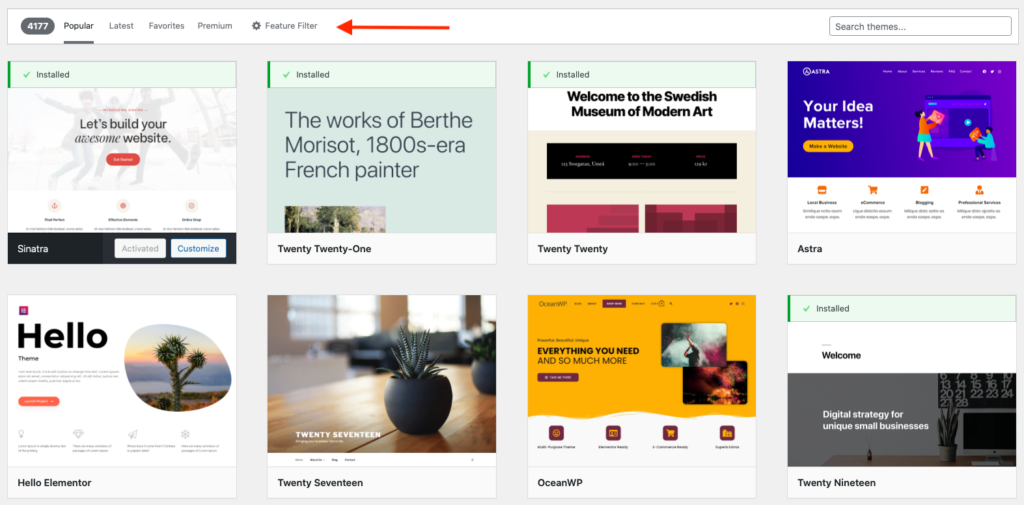
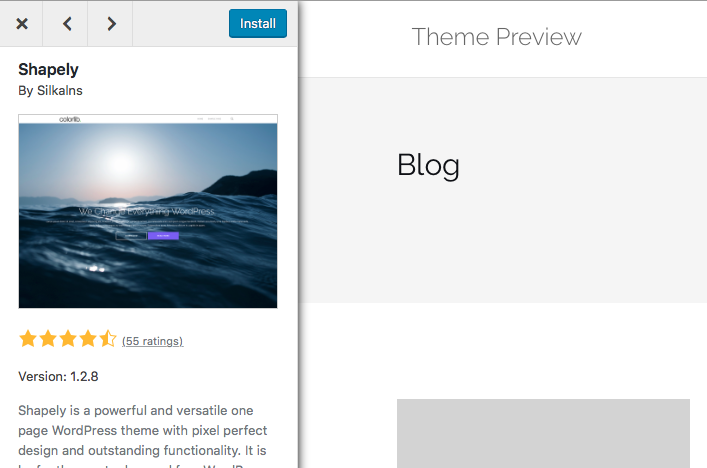
Installing new theme is easy, all you need is
- Choose a theme by simply clicking on one
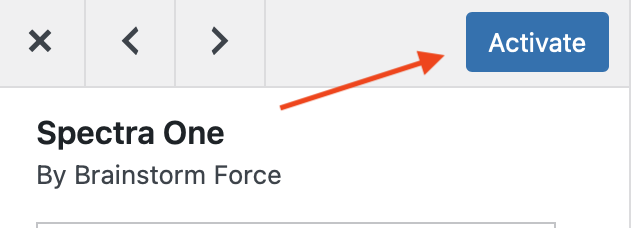
- Click install
- Final step is to click on Active the theme which will appear once installation is complete
Click Activate
To see the theme you have activated,
- Go to Appearance > themes
- Find the theme and start customizing.
If you want to access widgets, menu and other options for the theme you installed
In the admin dashboard go to Appearance > select customize for the theme you have installed.
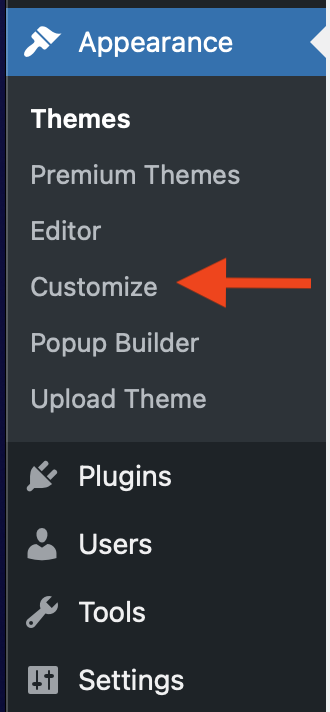
Now you can access options related to the theme you have activated such as widgets, menu and more.
Step 5: Create pages and add content
Now is time to start adding content to your site so it can be ready to launch.
Here are common thing every website needs
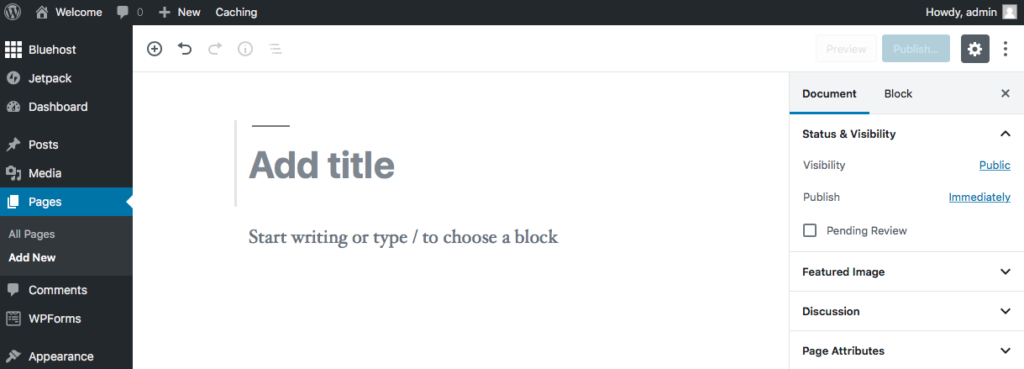
Add new page
To add new page in the sidebar, hover over pages and click on Add new or click on pages then select Add new, now give it a title
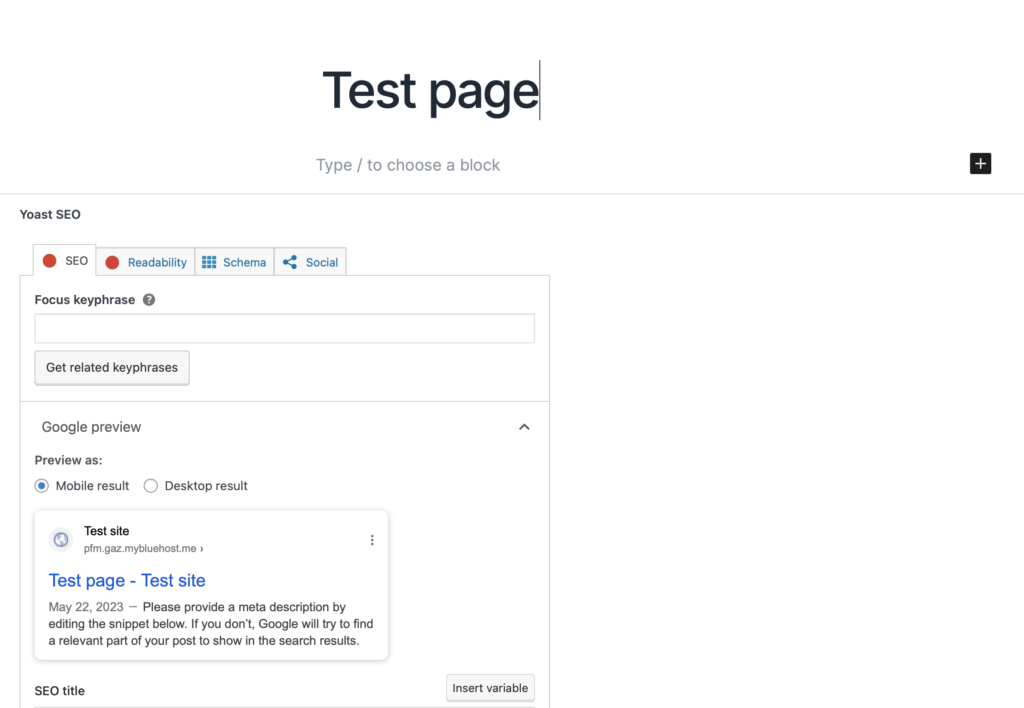
Add content
Next is to add content to your page like images, list, files etc.
Click inside the page where it’s saying start tying or type under title in this example under Test Page.
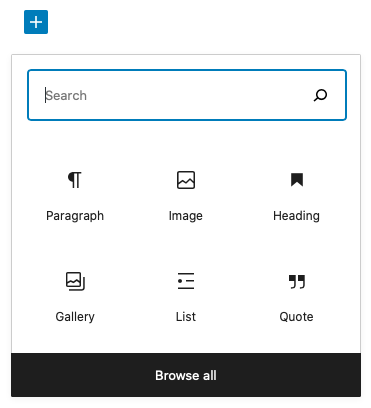
You will see a plus sign then you can search for things such as list, images etc.
Pro tip: When you click on the plus sign
- You can either search for what you want
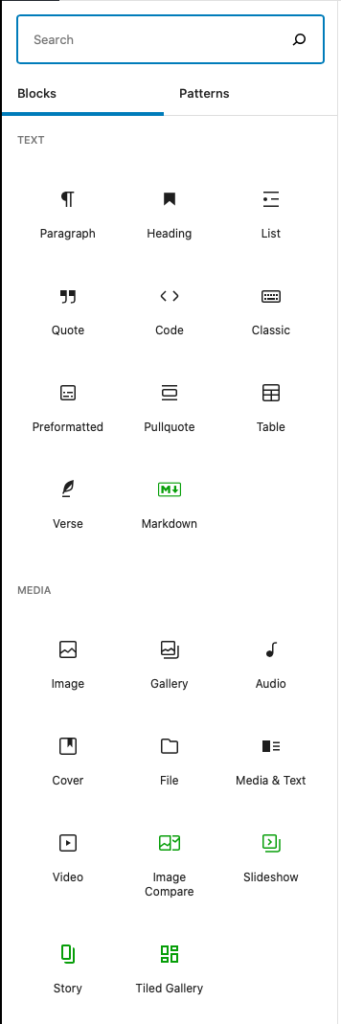
- Or click on the Browse all button to expand the list of options to the left hand side.
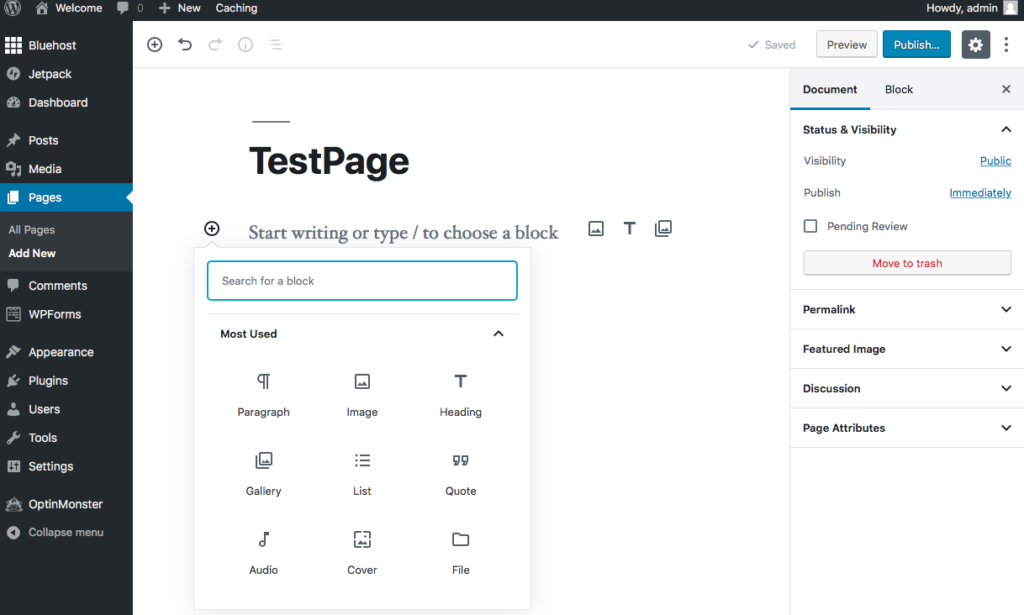
Click on Browse all to get lots of options you can use to build your website.
You can follow same process to create more pages.
Add menu items
When it comes to adding / modifying menu then it depends on the theme.
Option 1: some themes might have the option to add/modify menu by following the steps below
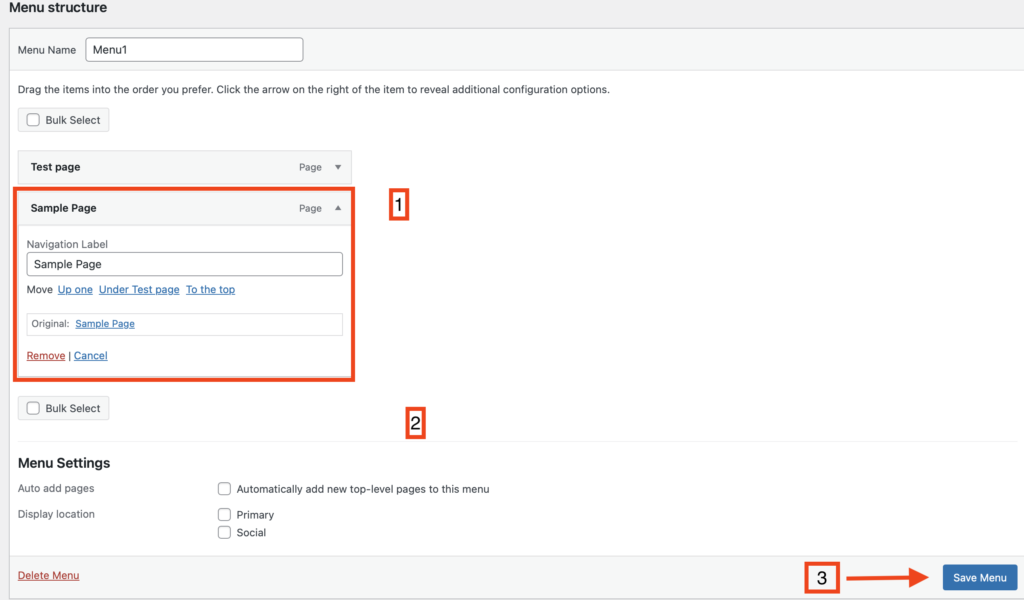
To customize menu items for your website then go to Appearance in the sidebar and choose Menu.
before creating a menu, you need to give the menu a name

Once you gave the menu a name, now you can add menu item to the current menu and this can be from the most recent (showing on the left side) or you can click on view all tab in the middle (left side) and select the page you would like to add.
You also have the option to add posts, custom links based on category.

In step 3 you can customize it as well when you click on the arrow (the highlighted options 1 & 2 in the image below are optional)
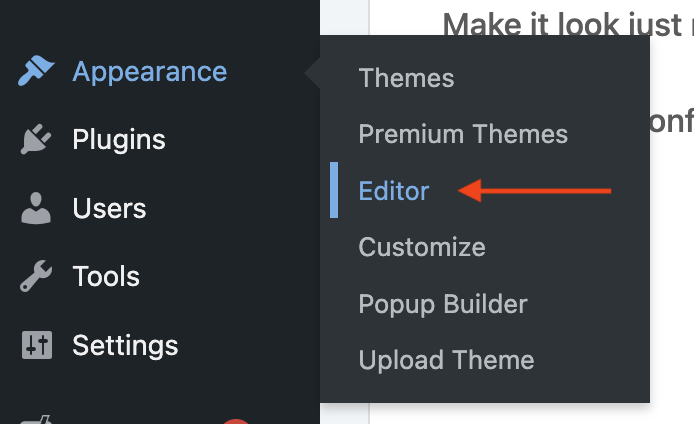
Option 2: Other themes might have the option to add/modify Menu by following the steps below
Go to Appearance > Editor > Templates Parts > Header > Edit
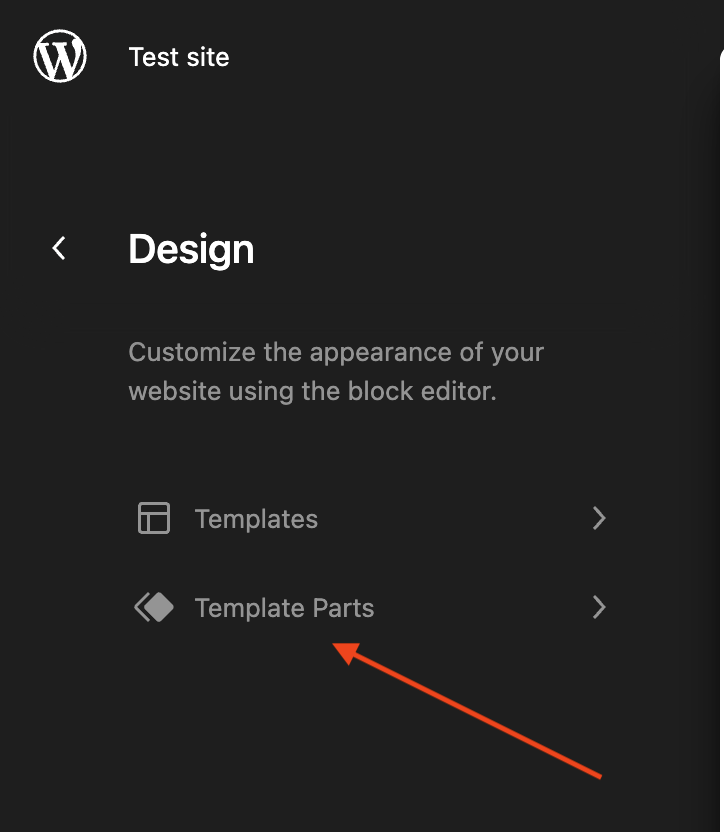
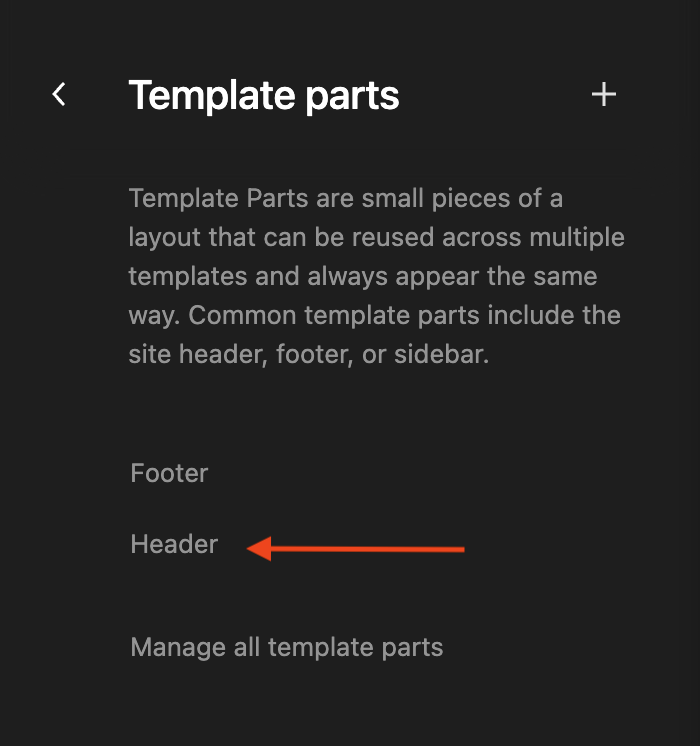

Then in the middle of the page you should be able to see the site and start editing
Looking at the header > menu > hover hover the menu and click on it then click on plus sign
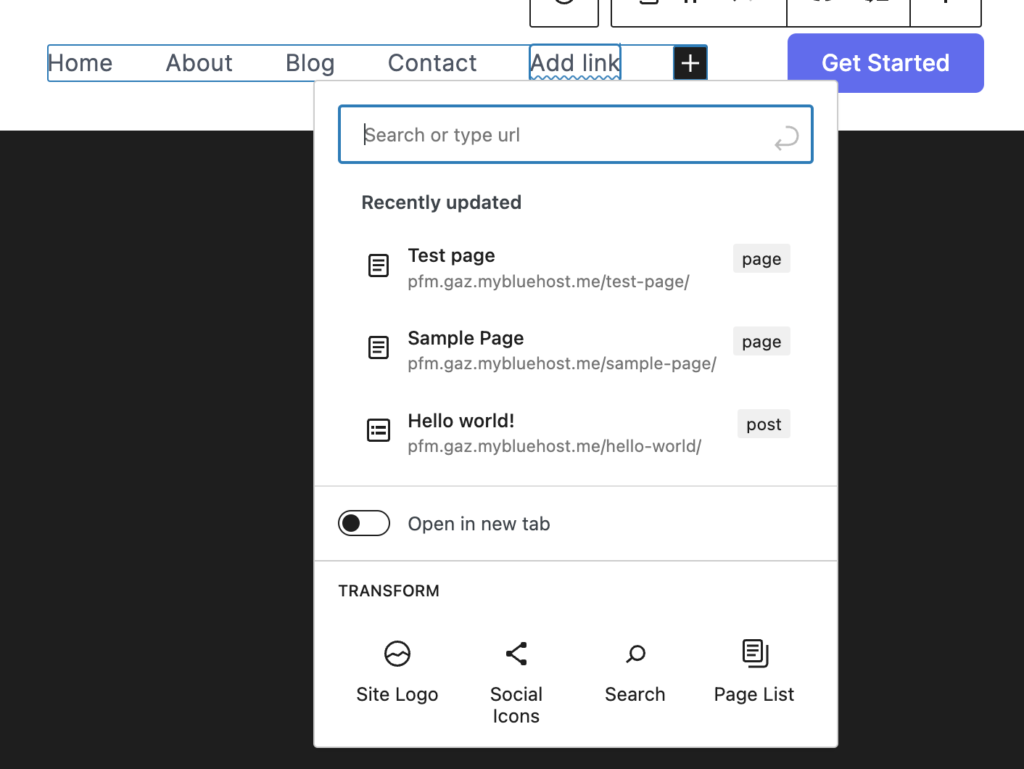
Once you click on the plus sign then you should see list of options to choose from, in this example search for navigation
Now you can select the page you want, in this example we have created a page called Test page so we’re selecting this option.

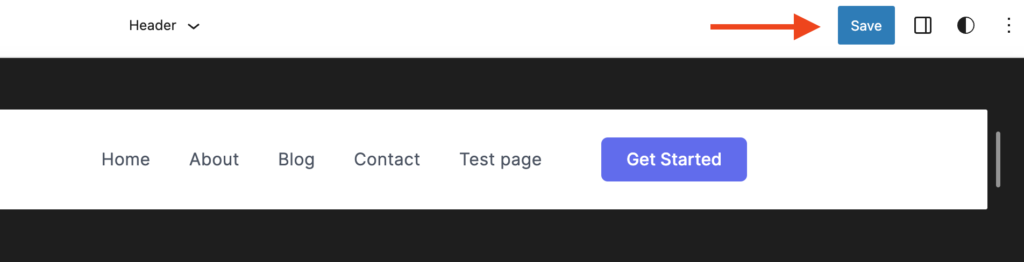
Once you finish then click save
Add/modifying menu items are different based on the theme you choose, in the above example we have demonstrated two ways how to add/ edit menu items based on two different themes.
If you come across a theme and you are not sure how to make the changes then please react out to us by sending a message or you can find us on social media as well. We’re here to help.
Step 6: Popular WordPress plugins
One of the important steps you need to do when you’re building a WordPress site is that you need to install plugins to your newly created website.
According to WordPress there are over 60,000 WordPress plugins, which means there are endless options to choose from.
Check out our beginner’s guide
- Essential WordPress Plugins which includes more WordPress plugins
- How to Install WordPress plugins step by step beginner’s guide
You might be asking yourself which plugin(s) do you need to install specially when you have a brand new website.
Below is a list of WordPress plugins that every WordPress website should have
We have put them into categories
SEO
Yoast: is a SEO (Search engine optimization) plugin for WordPress packed with features and designed to help visitors to get the most out of your website. The plugins offers lots of features, some of them are for free, to get more features then they offer two premium plans, the most popular one for $99/year USD and other one for $229/year. You can see a comparison between plans here (scroll down to the bottom to see plan comparison), in terms of discount they do offer a discount if you get minimum 2 licenses you can check out this page for more details.
Really Simple SSL: helps you to configure your website to use SSL, it adds extra security features to protect your website and It also improves your SEO rankings.
Backup
Updraft plus: is one of the most popular WordPress plugins for backup your website with installations over 3 millions, allows you to backup and restore your site, you have the option to backup your site to a cloud service of your choice such as Dropbox, Google Drive, Amazon S3 and Rackspce and if you have premium then you can backup to Microsoft One Drive, Microsoft Azure, SFTP and WebDAV.
With updraft plus you can use the FREE or get premium version which offers more features for example you get incremental backups, dedicated support and more.
Updraftplus subscription comes with a different plans such as Enterprise, Agency, Business, personal or Gold and each one of them comes with different pricing and features. Click here to view/Buy now.
To backup your site with updraft plus, all you have to do, install > activate > then setup the plugin to start backing up your website to your chosen cloud platform.
Caching
WP Rocket: (paid plugin) One of the best plugins you can use for caching which helps to speed up your site performance.
Sharing
Sassy Social Share: basically allows your website visitors to share your content over social media services such as Facebook, Twitter, Linkedin, Whatsapp, Tumblr, Pinterest, Reddit and over 110 more social sharing and bookmarking services.
FS Poster: is a social media auto-poster is developed to make WordPress users achieve the best social media experience and grow their online presence.
Contact form
Contact form 7: is a WordPress plugin lets you manage multiple contact forms, you can also customize the form. The good thing is that you can get Contact form 7 for free, there is no annual fees unless you want to make donations or purchase the plugin for $17 USD to support the team to continue the development for this plugin. You can pay the $17 USD here if you want to.
Advertisement
Wp-Insert: is a powerful optimized advertising WordPress plugin enables you to easily manage ads in WordPress, the plugins comes with lots of features for instance the plugins comes with the ability to hide ads on specific page, builtin support for Google page level ads, Google Adsense auto ads, Geo-targeted ads country specific and more. You can click here to read list of features.
Step 7: Optimizing your website
Why do you need to optimize your website to improve its speed?
Optimizing a WordPress website is important because it
- Improves user experience
- SEO ranking
- Lowers bounce rate
- Increases conversion rate
A faster and well-optimized website provides a better user experience, helps in search engine ranking, reduces bounce rate, increases conversions.
How can you optimize your website ?
- Use a good web-hosting provider: for MakeWebsiteExpert, we’re using Bluehost for many years and they have been great but you there are other good providers you can choose from, check out our guide on Best Web-hosting providers.
- Enable caching plugin for your website, to add one then install a cache plugin like WP Rocket which is a very popular plugin is used for caching or WP Super Cache which is another popular cache plugin.
- Use Content delivery network CDN: a CDN is an important tool for website owners who want to improve website performance, user experience, SEO ranking, website availability, and reduce bandwidth costs. For CDN you can use CloudFlare which is the best CDN you can use for your website, CloudFlare offers lots of features starting with managing DNS, cache management so your website will be faster, also CloudFlare makes your website more secure and more.
- Optimize images: Imagify basically it’s a plugin to help you resize and compress images.
- Minify HTML, CSS and JavaScript (making website files smaller): Install Autoptimize plugin they offer free and paid options.
Tools you can use to check the speed of your website
Step 8: Publishing your website
To begin you first need to login to your Bluehost account (or any other hosting provider you have chosen)
Click on Hosting
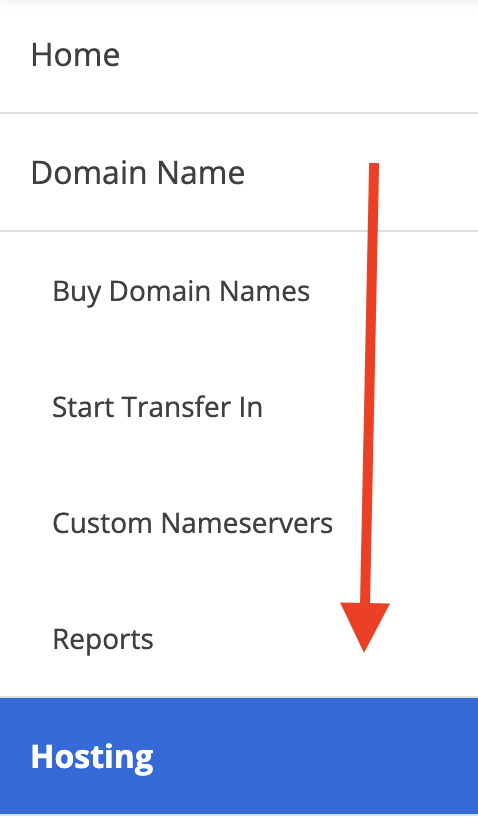
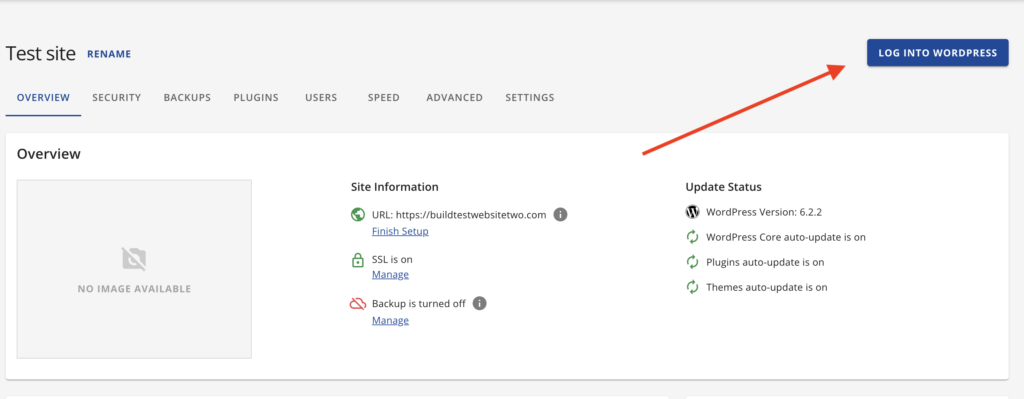
Then on the right side select your site.

Click on Login with WordPress
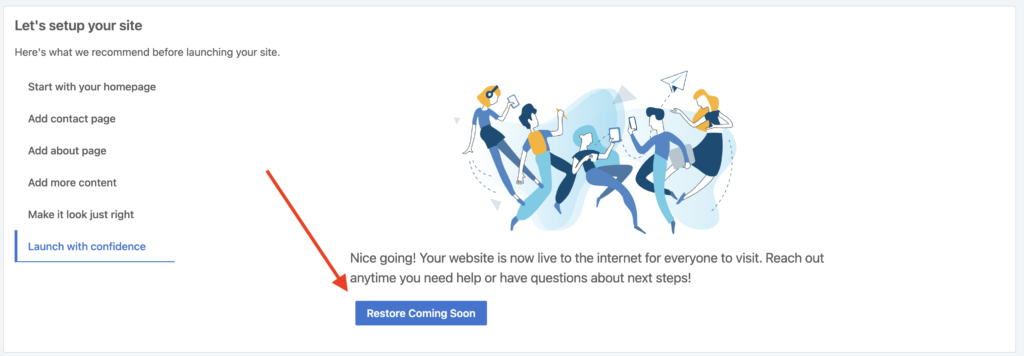
Once you are in the dashboard, on the top right corner you will see Site status coming soon.
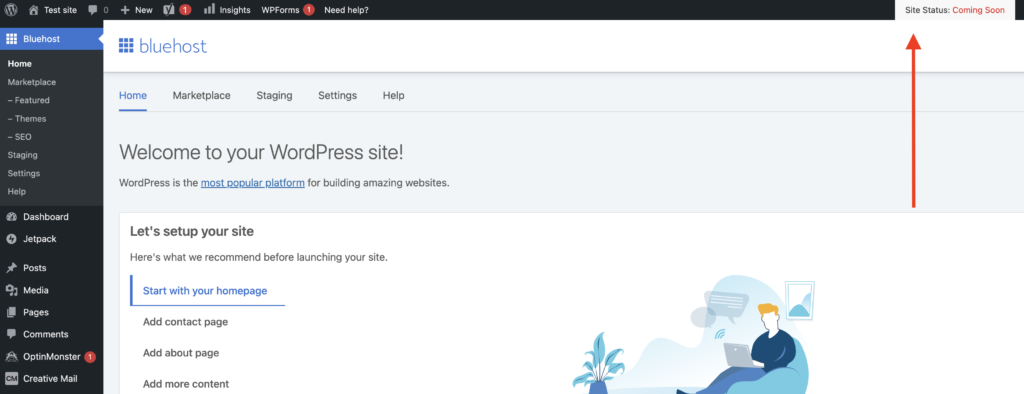
to launch your website then in the same page, scroll down and select launch
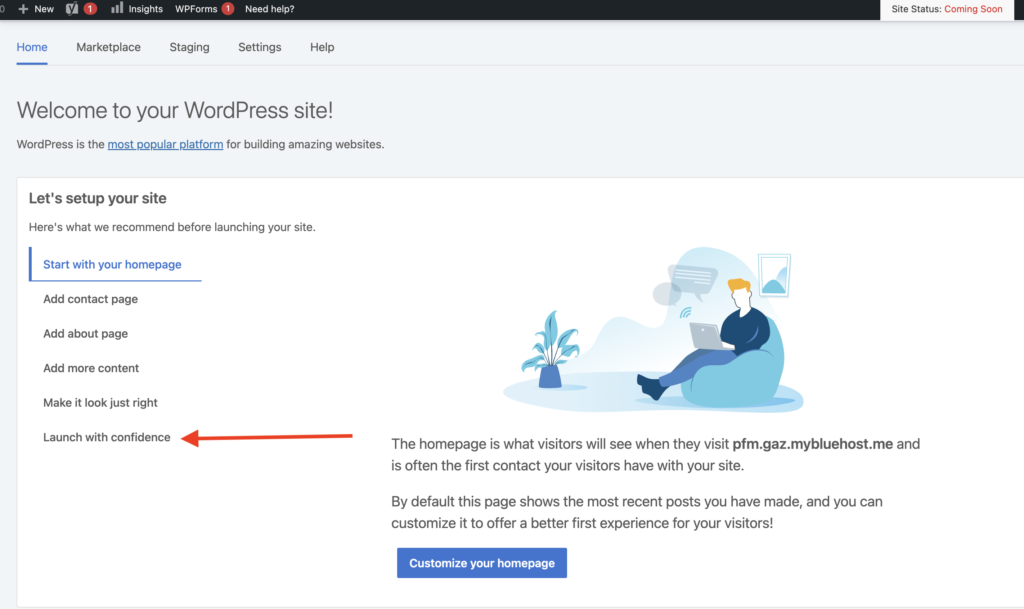
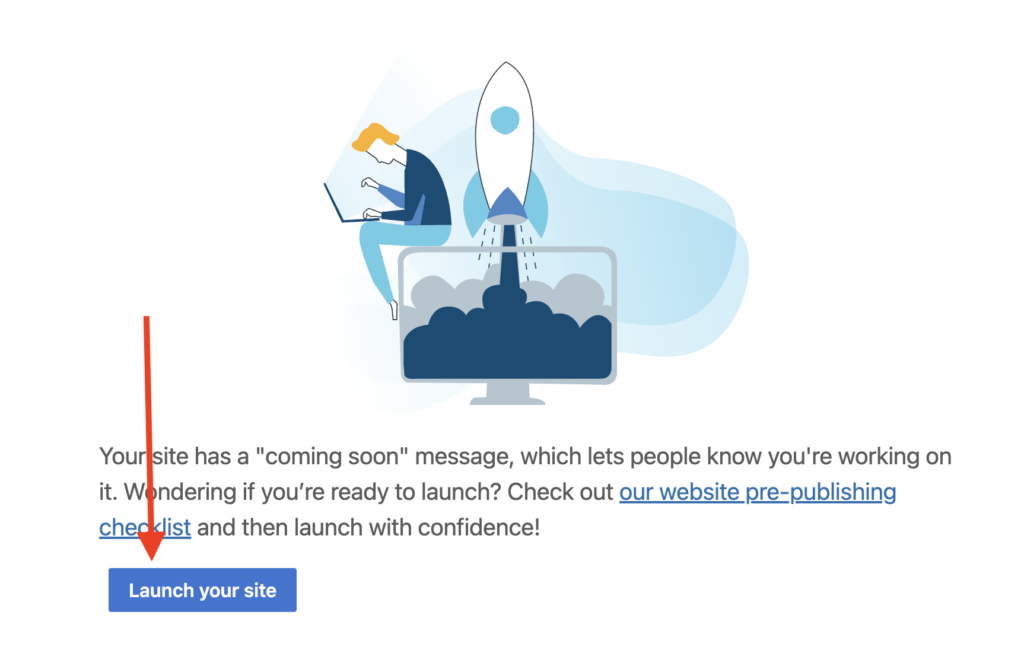
When you click on Launch with confidence, you should see the button to launch the site
Pro tip: you can go through Bluehost Pre-publish checklist to check few things before you launch.
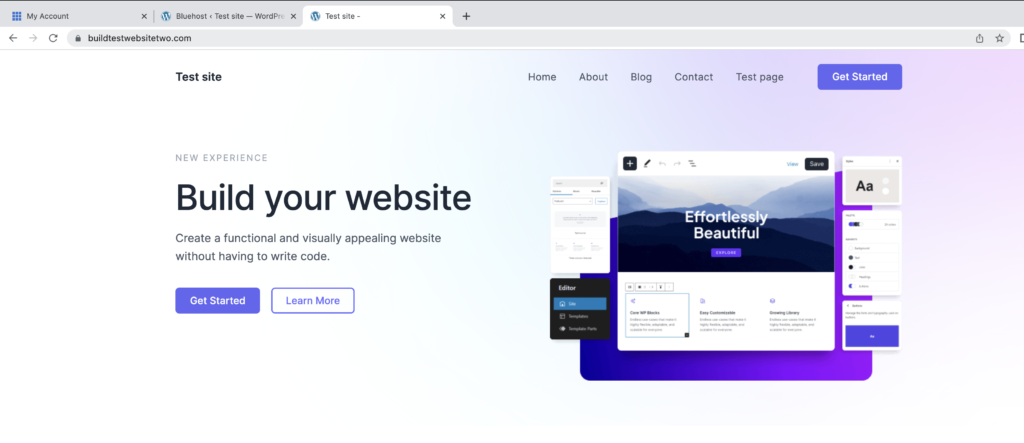
Website is live
Pro tip: if you want to restore coming soon page then go to
- Dashboard area
- Click on Bluehost
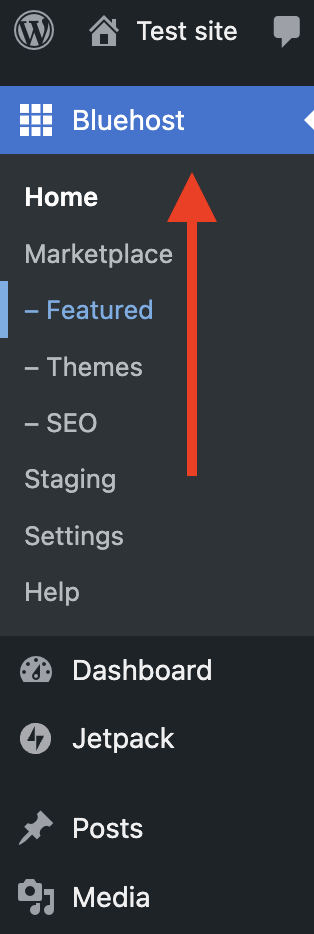
Then on the right side go to Launch with confidence > Restore Coming soon
Step 9: Maintaining your website
Why is WordPress maintenance important?
- To keep your website secure, optimized for performance
- keeping the user interface up-to-date to make the site user-friendly
- Search engine optimization (SEO)
- Backed up for quick recovery in case of disasters.
It ensures that your website is functioning optimally, which can lead to more traffic, leads, and sales for your business.
How to optimize your WordPress website ?
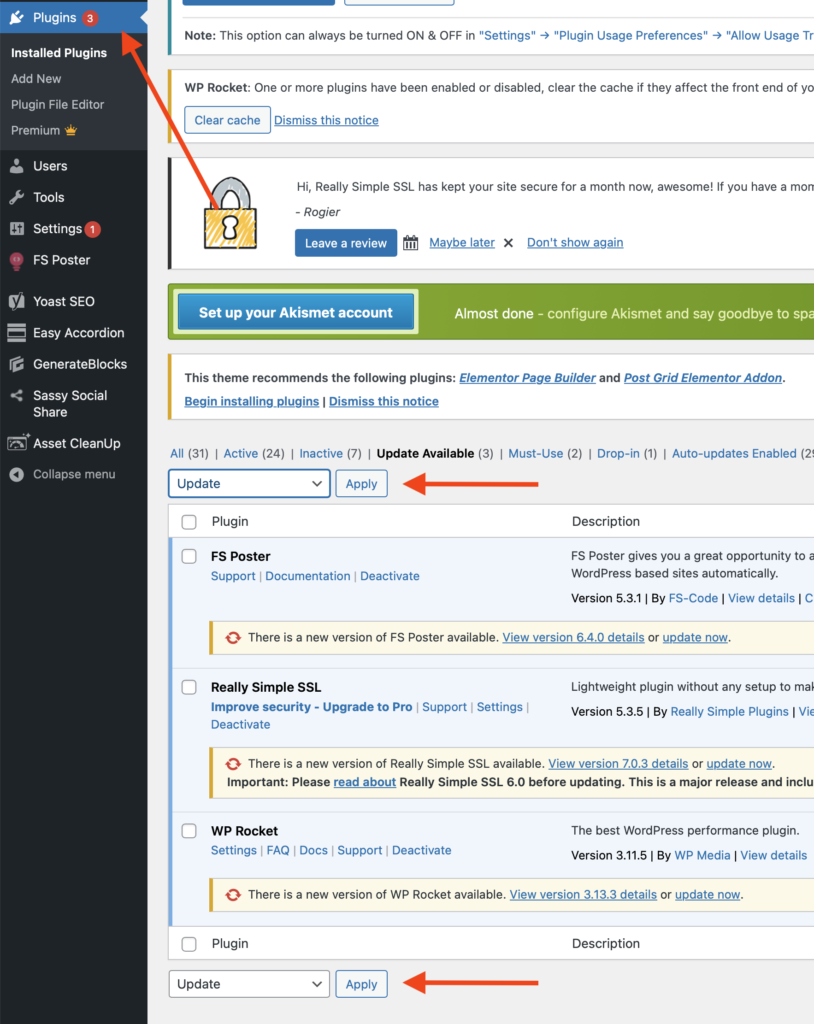
- Keep WordPress and plugins updated: Regularly update your WordPress software and plugins to ensure that your site is secure, and its functionality is up-to-date.
To check if there is an update available to the plugins go to Dashboard > Plugins then in the filter bar select Update available
Pro tip: you can update plugins individually or if you want to update all plugins at the same then select Update from the dropdown list next to Apply then click Apply.
- Backup your website regularly: Backing up your website regularly will ensure that you can restore it in case if things go wrong let’s say your website is broken due to recent update from a plugin etc. To backup then you can use a backup plugin or your web host’s backup system to backup your website. You can UpDraft backup or any other plugin to backup your website.
- Monitor your website’s performance: Use a website monitoring tool to check your website’s performance regularly. This will help you identify and fix any issues that may affect your website’s speed and reliability. You can use Pingdom, Pagespeed or Gtmetrix.
- Keep your website’s content fresh: Regularly update your website’s content to keep it fresh and engaging. This will help keep visitors coming back to your website.
- Secure your website: Use security plugins and practices to secure your website from attacks. This includes using strong passwords, limiting login attempts, and adding SSL such as Really simple SSL to encryption to your site.
- Fix broken links, you can use free tool such as Ahrefs
- Delete inactive themes and plugins.
- Delete un-used images.
- Optimize your website for search engines: Use SEO techniques to optimize your website for search engines. This includes adding keywords to your content, using descriptive titles and meta descriptions, and ensuring your website is mobile-friendly.
How do you generate a sitemap for my website using Yoast SEO?
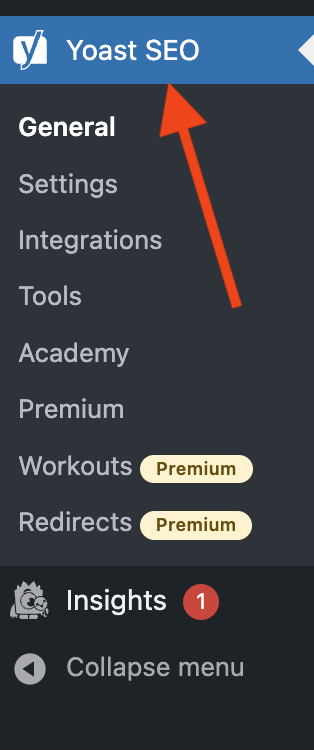
To generate a sitemap, In the dashboard area go to the left side in WordPress admin page then select Yoast SEO
Note: You need to have SEO plugin installed to be able to see Yoast SEO.
Yoast SEO > General > Settings > then scroll down and check Enable feature is ON.
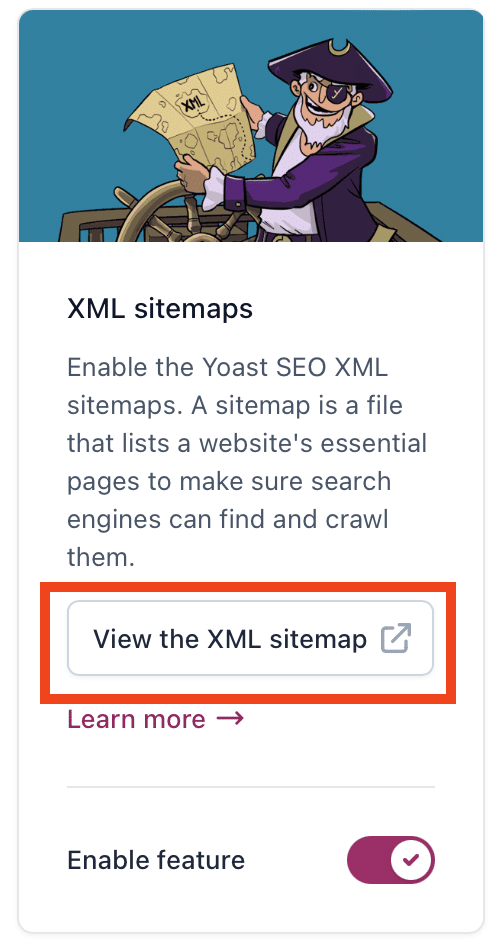
To view sitemap for your website then go to
SEO > General > Settings > then scroll down to XML sitemaps and click on View the xml sitemap.
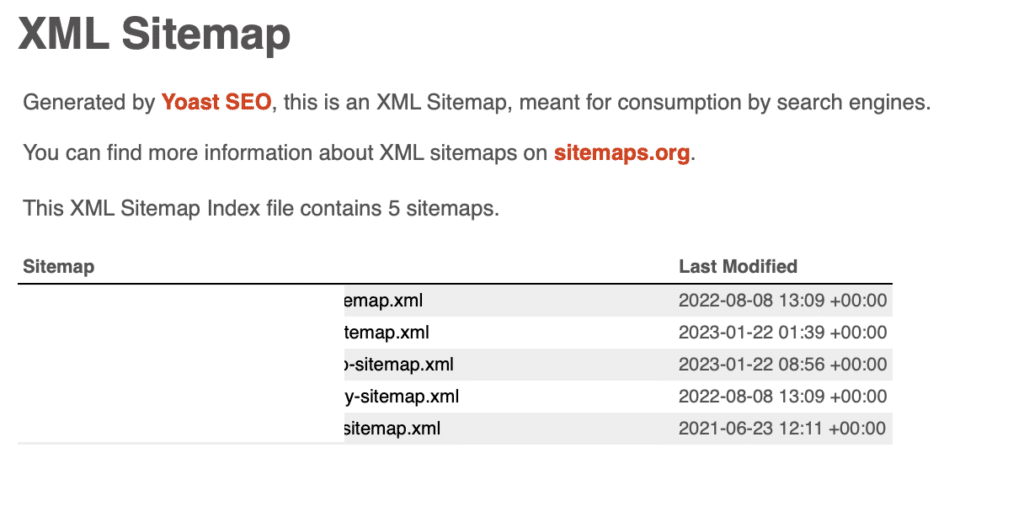
This is an example of a generated sitemap by Yoast SEO
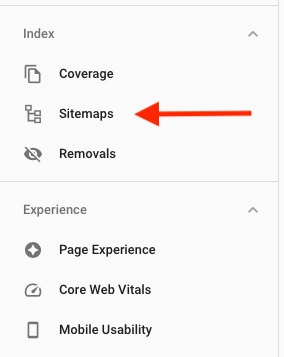
- To submit your sitemap to Google search console you need to copy the link for the sitemap from SEO in the WordPress dashboard Go to SEO > General > Features > click on question mark for XML sitemaps then click on “See the XML Sitemap” copy the link, after that go to Google search console (sign up if you have not already) > Sitemap which is located on the left side.
Paste the copied Url for the site map which is sitemap_index.xml in the below text box.

WordPress Ping List: there is a list of urls you can add to your website, this list of urls notifies search engines to crawl and index your site to get new content from your site onto search engines. To copy the list of urls to your site then first go to this site, scroll down to WordPress Ping list for faster indexing copy list of urls and go to WordPress admin in your site > Settings > Writing > scroll down to update services, paste list of urls into the box then save changes.
FAQ
How does a complete beginner can learn how to use WordPress?
First step you need to do buy a domain, it doesn’t have to be an expensive one, then start building a website with WordPress
- Select a theme
- Start adding a page or two
- Add images, videos, a list etc to the page
- Learn how to install/update plugins
- Learn how to get the site back to a working state if it’s broken due to a recent update or something.
- Open social media accounts and integrate your site with social media.
- Try to add Woocommerce to your website basically to build an e-commerce website in WordPress, the other option to build an e-commerce website is to use Shopify, regardless which platform you use, playing with payment is a good experience since you will learn for instance how to process payment in a testing environment before launching the site.
You can take advantages of some of the tutorials by WordPress.org, they have FREE webinars for example covers the different topics such as site editor vs page editor and more.
I recommend you visit their learning page.
Once you are familiar with how to make a simple site has few pages, contact form, a logo, menu etc then next step is to get your hands dirty with SEO, both learning how to create a website and SEO are two important skills to learn.
Any website without a good SEO is almost useless, SEO not only helps you to get more visitors means more sales but SEO is a skill you might become SEO expert or both building website and doing SEO as well.
When it comes to SEO, you don’t have to be an expert however at least learn the basics of SEO and use the site you’re building as an example to practice SEO as well.
Remember everything takes time, things don’t happen overnight so learn the basic of how to build a website, learn the fundamentals first then move to other stuff like SEO.
What is the easiest way to build a Website?
If you’re looking for a solution outside the box then a
- Website builder (check out our guide best website builder) such as Weebly, Wix, Squarespace and more as they offer a solution kind of plug play. with website builder you don’t have to care about maintenance like updating plugins, security, speed etc.
- With WordPress is more hands on, you need to do maintenance by yourself to the site,, update plugins, security etc also you have more freedom as you have endless ways to build a unique website whether you choose to use FREE or premium themes or endless plugins to choose from.
How do I build a WordPress website?
There are steps you need to do to make a WordPress website
- Step 1: choose a domain and web hosting company: a domain is the name of your website such as www.mywebsite.com and we hosting provider such as Bluehost, is the company is going to host your website online, each provider has different plans to choose from so you can choose the one suits your budget and requirements then you can upgrade plan when needed. You can check our guide o best web-hosting provider.
- Step 2: install WordPress: once you have chosen a domain and hosting provider then next step is to install WordPress so you can start building your website, many web-hosting providers offer a one click installation of WordPress.
- Step 3: choose a theme for your website, you have the option to use free or premium themes then start customizing.
- Step 4: add content to your site such as pages, posts.
- Step 5: install plugins to add more functionally to your website.
- Step 6: test your site, it’s important to test your site thoroughly before launching to make sure the site works properly.
- Step 7: finally launch
What are the basic requirements for building a website?
Same answer as question 3
How to make your own website?
Same answer as question 3